Run db-agent Locally: Text-to-SQL AI Agent with Ollama (Windows & Mac)
Set up the open-source db-agent AI agent on Windows or Mac with Ollama and a free local Qwen model. Ask Postgres or SQLite questions in plain English. No API key, no cloud.
This guide shows you how to run db-agent, an open-source text-to-SQL AI agent, on your own computer. You type a question in plain English, and db-agent writes a read-only SQL query, runs it against SQLite or your own Postgres database, and shows you the results. The AI model runs locally through Ollama (we use the small, free Qwen 2.5 Coder 0.5B model), so there is no cloud account and no API key.
It works on Windows and Mac. Every command is copy-paste ready, with instant fixes for the errors people hit most often.
What you need: Git, Node.js v22.5 or higher, and Ollama. All three are covered in the steps below.
Prefer a hosted setup? If you would rather run db-agent as an app on a free Databricks workspace instead of on your laptop, follow Run a Text-to-SQL AI Agent on Databricks Free Edition.
Step 0: Install the Prerequisites (One-Time Setup)
Before downloading the project, your computer needs two base tools: Git (to download the code) and Node.js v22.5 or higher (to run the app and its built-in SQLite database).
On Mac (open the "Terminal" app)
-
Check/Install Git:
git --version
(If a pop-up opens asking to install "Command Line Developer Tools", click Install.)
-
Install Node.js (v22+): Go to nodejs.org, download the macOS Installer (.pkg) for v22 (LTS), and click through the installer.
-
Verify Node version:
node -v(Must show
v22.5.0or higher.)
On Windows (open "PowerShell")
-
Install Git: Download and run the installer from git-scm.com/download/win (just click Next on all screens).
-
Install Node.js (v22+): Go to nodejs.org, download the Windows Installer (.msi) for v22 (LTS), and install it.
-
CRITICAL: Close your PowerShell window and open a brand new one, then verify:
git --version
node -v
Troubleshooting Step 0
- Error:
'node' or 'git' is not recognized as an internal or external command(Windows) orcommand not found(Mac).- Why it happens: Your terminal doesn't know the tool was just installed.
- Fix: Completely close your Terminal/PowerShell window and open a fresh one. If it still fails on Windows, restart your computer so the system
PATHupdates.
- Error:
Error: Cannot find module 'node:sqlite'(happens later when starting the app).- Why it happens: Your Node.js version is older than
v22.5.0(for examplev18orv20), which lacks the built-in SQLite engine. - Fix: Download and install the latest v22 LTS from nodejs.org right over your existing installation.
- Why it happens: Your Node.js version is older than
Step 1: Install Ollama and Download the Qwen 2.5 Coder (0.5B) Model
Ollama is the local AI engine on your computer. It runs models completely offline without cloud subscriptions or API keys. Choose either the one-line terminal installer or the graphical installer below.
1. Install the Ollama app
Method A: One-line automated command (fastest)
Run the official script directly in your terminal to download, configure and register Ollama automatically.
On Mac (open Terminal):
curl -fsSL https://ollama.com/install.sh | sh(Behind the scenes: it fetches Ollama's official setup script and links the CLI tools to your Mac. If it asks for your password, type it and press Enter. No characters will appear on screen.)

Type the password after this step, and then you will see the progress as shown below.

On Windows (open PowerShell as Administrator):
irm https://ollama.com/install.ps1 | iex(Behind the scenes: irm downloads the official Windows installer script, and iex runs the silent setup without any browser wizard.)

Method B: Graphical installer (standard setup wizard)
If you prefer clicking through an installer window instead of using scripts:
On Mac:
- Visit ollama.com/download and click Download for macOS.
- Unzip the downloaded archive and drag the Ollama icon into your Applications folder.
- Open Ollama from Applications once so it can register command-line permissions.
On Windows:
- Visit ollama.com/download and download
OllamaSetup.exe. - Run
OllamaSetup.exeand complete the on-screen steps. - Verify that the Ollama llama icon appears in your taskbar system tray (bottom-right near the clock).
2. Download the AI model
- Open your terminal (Terminal on macOS or PowerShell on Windows).
- Run the following command:
ollama run qwen2.5-coder:0.5b-instructThis command downloads the model if it isn't already available and starts it.


To exit the session, type /bye.
Verification: run the list command to make sure the model is ready:
ollama listExpected output: you should see qwen2.5-coder:0.5b-instruct listed under NAME.

One important configuration change: to use it in db-agent, update the model name in your .env file too (you will create that file in Step 3):
LLM_MODEL=qwen2.5-coder:0.5b-instructStep 1 Troubleshooting Matrix
| What you see (the error) | Why it happens | Instant solution |
|---|---|---|
'irm' is not recognized as an internal or external command (Windows) | You pasted the command into classic Command Prompt (cmd) instead of PowerShell. | Close Command Prompt. Press Win + X, select Terminal or search for PowerShell, and paste the command there. |
running scripts is disabled on this system (Windows) | PowerShell's execution policy blocks running web scripts. | Run Set-ExecutionPolicy -Scope Process -ExecutionPolicy Bypass first to allow scripts for the current session. Type Y, press Enter, then rerun irm https://ollama.com/install.ps1 | iex. |
ollama: command not found (Mac) or 'ollama' is not recognized... (Windows) | The terminal session opened before the installation path was registered. | Close your terminal window completely and open a new one. On Mac, make sure you opened the Ollama app from Applications at least once. |
sudo: a password is required (Mac) | The install script needs administrative access to put the ollama binary into /usr/local/bin. | Type your Mac login password and press Enter (the cursor stays still for security). |
Error: could not connect to ollama app, is it running? or connect ECONNREFUSED 127.0.0.1:11434 | The Ollama service is not running in the background. | Launch the Ollama app from Applications or the Start Menu, or open a separate terminal tab and run ollama serve. |
Error: pull model manifest: file does not exist | A typo in the model tag (for example a missing :0.5b-instruct or an extra space). | Make sure the tag matches exactly: ollama pull qwen2.5-coder:0.5b-instruct. |
| Connection dropped / download timeout | A transient network drop interrupted the model download. | Rerun the same ollama pull command. Ollama caches partial downloads and resumes where it left off. |
Step 2: Download the Project Code
Run these commands in your Terminal (Mac) or PowerShell (Windows) to download the project and move into the app folder:
# 1. Download the repository
git clone https://github.com/db-agent/db-agent.git

# 2. Enter the main folder
cd db-agent

# 3. Enter the application directory
cd app
Troubleshooting Step 2
- Error:
fatal: destination path 'db-agent' already exists and is not an empty directory.- Why it happens: You already ran
git cloneearlier in this same folder. - Fix: Skip the clone step and just move into the folder:
cd db-agent/app.
- Why it happens: You already ran
- Error:
cd: no such file or directory: app- Why it happens: You are already inside the
appfolder, or still outsidedb-agent. - Fix: Run
pwd(Mac) orcd(Windows) to see where you are. Make sure your folder path ends with/db-agent/app.
- Why it happens: You are already inside the
Step 3: Create and Edit the .env Configuration File
The app uses a hidden file named .env to know which AI model and database to use. You will copy the template file (.env.example) into a real .env file and update it.
1. Copy the template file
(Make sure your terminal is inside the db-agent/app folder.)
Mac:
cp .env.example .envWindows (PowerShell):
Copy-Item .env.example .env(If you are using the old Command Prompt cmd, run copy .env.example .env.)
2. Open .env in VS Code
Choose whichever method is easiest.
Method A: From the terminal (fastest)
code .envMethod B: Graphical / drag-and-drop (no terminal setup needed)
- Open the Visual Studio Code application.
- Click File > Open Folder... (or press
Cmd + Oon Mac /Ctrl + Oon Windows). - Select the
db-agent/appfolder and click Open. - In the left-hand Explorer sidebar, click
.envto open it in the editor.
3. Update the settings
Find these lines in the file (or paste them at the very bottom) so the app uses your local Ollama Qwen 2.5 Coder 0.5B model and the built-in SQLite demo database:
# --- AI Model Settings (Local Ollama) ---
LLM_BASE_URL=http://localhost:11434/v1
LLM_API_KEY=ollama
LLM_MODEL=qwen2.5-coder:0.5b-instruct

# --- Database Settings ---
# Keep 'sqlite' to test immediately with the built-in retail demo database (demo.db)
SQL_ENGINE=sqlite

# --- Port & Memory ---
PORT=3001
MEMORY_ENABLED=false
Optional: Connect db-agent to Your Own Postgres Database
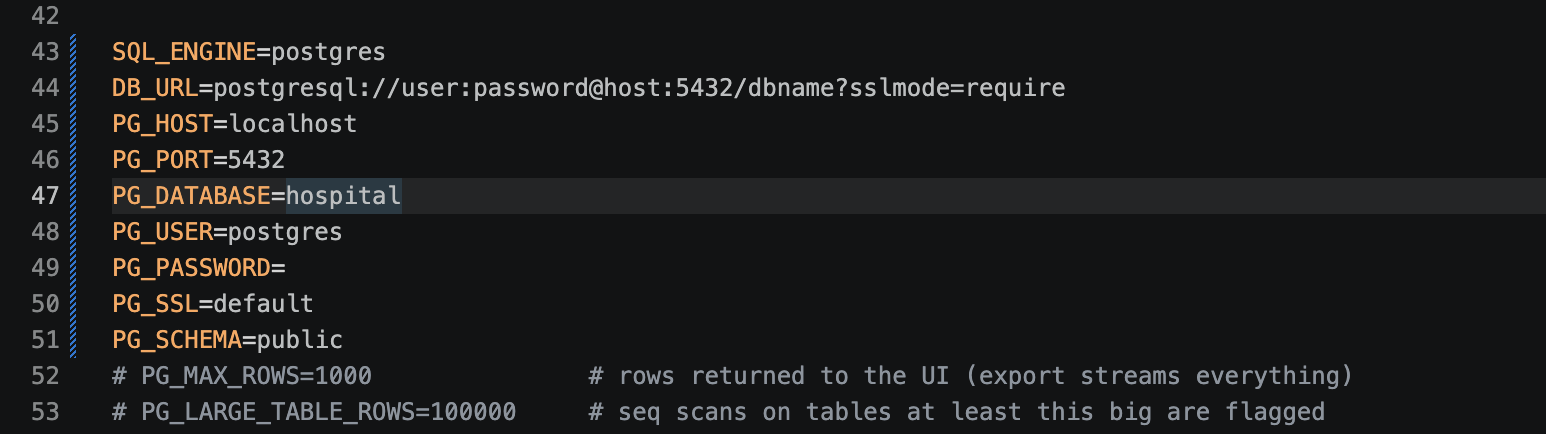
Use this when you already have a Postgres database, on your Mac or in the cloud. You need its host, port, database name, username and password. db-agent only reads data. It never changes it, but a read-only user is still safest.
O1. Edit .env in VS Code
- Change
SQL_ENGINE=sqlitetoSQL_ENGINE=postgres. - Add these two lines at the end, filled in with your details:
DB_URL=postgresql://USERNAME:PASSWORD@HOST:5432/DATABASE
PG_SSL=false| Part | Example | Notes |
|---|---|---|
USERNAME | postgres | Your database user |
PASSWORD | mypassword | If it contains @ : / # ?, see the error table below |
HOST | localhost | localhost if Postgres runs on this computer, or the server address |
5432 | 5432 | The usual Postgres port |
DATABASE | hospital | The database name |
Keep PG_SSL=false for a database on your own computer. Delete that line for a cloud database (AWS, Azure, Supabase, Neon), because they need a secure connection. If your tables aren't in the public schema, also add PG_SCHEMA=yourschema.
Notes:
- Enter
DB_URLas explained above. - You must supply the password (look for the connection details in your database properties).
Video: where to find your Postgres connection details
Watch on Loom if the video does not load.
Video: set up a new Postgres server
Watch on Loom if the video does not load.
O2. Save, then start db-agent in the db-agent/app folder:
npm startYou should see SQL engine: postgres. Open http://localhost:3001 and ask about your own tables.
| If you see | Do this |
|---|---|
SQL_ENGINE=postgres requires either DB_URL... | The DB_URL line is missing or starts with #. Fix it in .env. |
connect ECONNREFUSED 127.0.0.1:5432 | Postgres isn't running, or the host or port is wrong. |
password authentication failed for user | Wrong username or password. |
database "..." does not exist | Wrong database name in DB_URL. |
The server does not support SSL connections | Add PG_SSL=false to .env. |
no pg_hba.conf entry ... no encryption | The server needs a secure connection. Delete the PG_SSL=false line. |
Invalid URL or odd login errors | Your password has special characters. Replace @ with %40, : with %3A, / with %2F, # with %23, ? with %3F. |
| The app shows no tables | Your tables are in another schema. Add PG_SCHEMA=yourschema. |
permission denied for table ... | Ask your database admin to give your user SELECT access. |
Press Cmd + S (Mac) or Ctrl + S (Windows) to save, then close the editor.
Troubleshooting Step 3
- Error (Windows trap): your changes in
.envare completely ignored by the app.- Why it happens: Windows Notepad sometimes silently saves the file as
.env.txtinstead of.env. - Fix: Always create the file with the terminal command (
Copy-Item .env.example .env) first, and then open it withnotepad .env.
- Why it happens: Windows Notepad sometimes silently saves the file as
- Error:
SyntaxErrororInvalid URLwhen starting the app.- Why it happens: Spaces around the
=sign (for exampleLLM_MODEL = qwen2.5-coder:0.5b-instruct), or forgetting/v1at the end ofhttp://localhost:11434/v1. - Fix: Remove all spaces around
=and make sureLLM_BASE_URL=http://localhost:11434/v1is exact.
- Why it happens: Spaces around the
Step 4: Run the Application
Now compile the web interface and start the server.
On Mac (automated one-click script)
Inside the db-agent/app folder, run:
chmod +x run_local.sh
./run_local.sh
(The script checks Ollama, installs packages, builds the React UI, and starts the server.)
On Windows (and the manual Mac method)
Windows PowerShell cannot run .sh (Mac/Linux bash) scripts natively. Instead, run the three commands inside that script directly:
# 1. Install backend and frontend packages (takes 1-2 minutes the first time)
npm install

# 2. Build the React web interface
npm run build

# 3. Start the db-agent server
npm start
Open the app
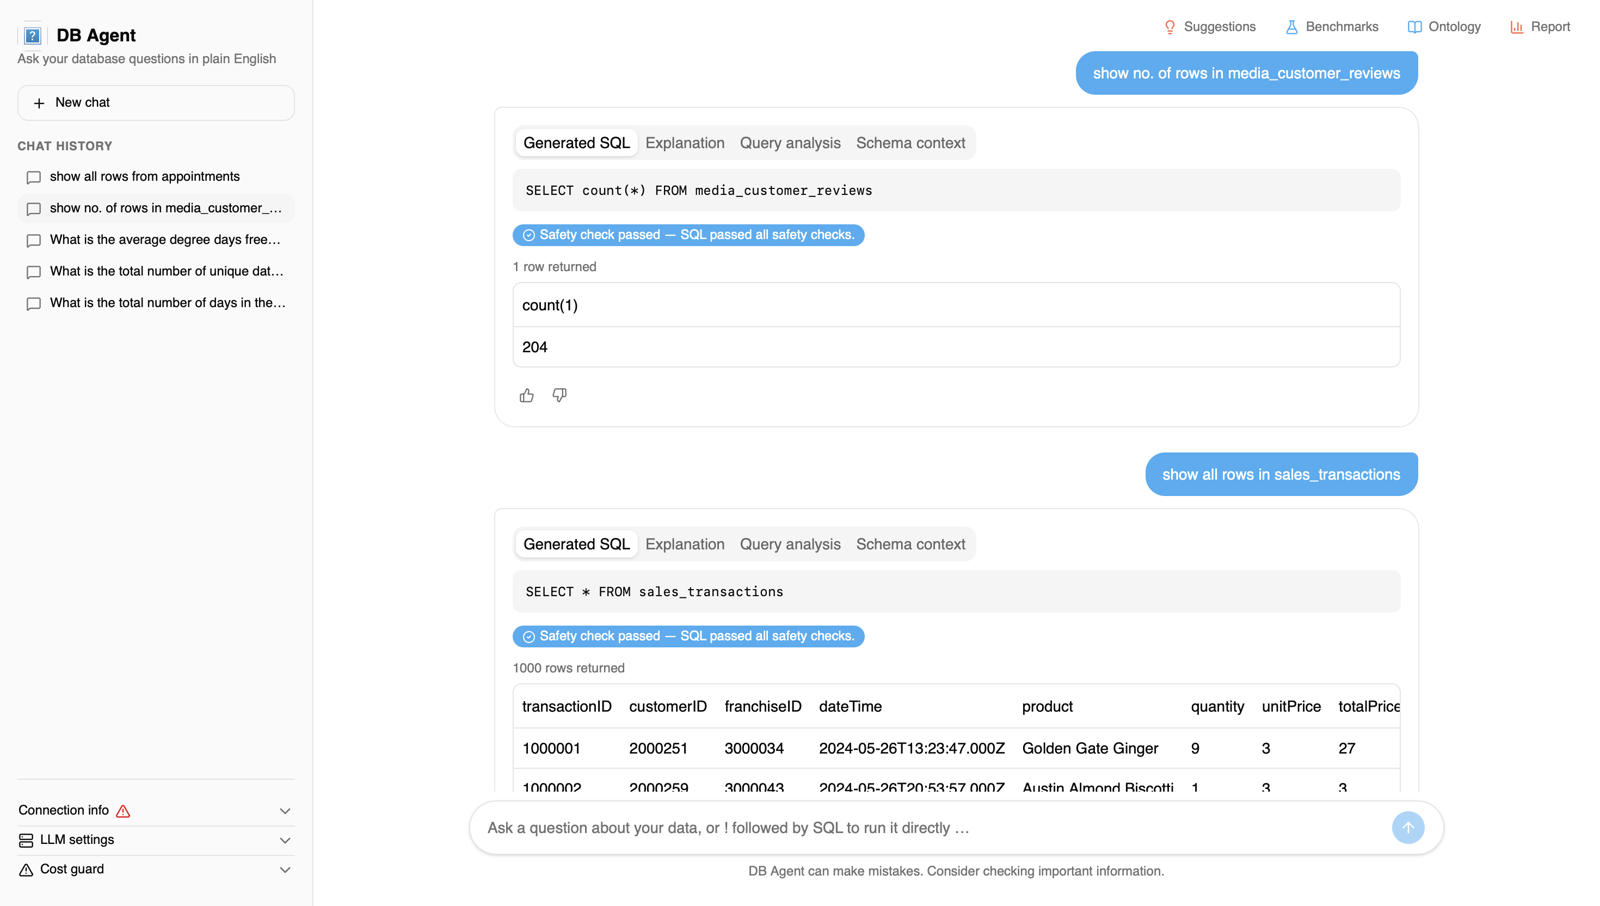
Once your terminal says the server is listening, open your web browser (Chrome, Edge, Safari) and go to http://localhost:3001. Sample screens are at the end of this page.
Step 4 Troubleshooting (Common Runtime Errors)
| What you see (the error) | Why it happens | How to fix it instantly |
|---|---|---|
'./run_local.sh' is not recognized... or Windows opens a file popup | Windows PowerShell doesn't run .sh bash scripts natively. | Run the 3 manual commands instead: npm install, then npm run build, then npm start. (Or run ./run_local.sh inside Git Bash.) |
zsh: permission denied: ./run_local.sh (Mac) | The script is not marked executable. | Run chmod +x run_local.sh first, then run ./run_local.sh again. |
Error: listen EADDRINUSE: address already in use :::3001 | db-agent (or another program) is already running on port 3001 in another window. | Option A: set PORT=3002 in your .env and open http://localhost:3002. Option B (kill the old process): Mac: lsof -ti:3001 | xargs kill -9. Windows: Stop-Process -Id (Get-NetTCPConnection -LocalPort 3001).OwningProcess -Force |
404 Model '...' not found (shown in the chat UI when you ask a question) | The LLM_MODEL name in .env hasn't been downloaded into Ollama yet. | Run ollama pull qwen2.5-coder:0.5b-instruct in your terminal and check that it appears in ollama list. |
Cannot GET / when opening http://localhost:3001 | The frontend React UI (web/dist) wasn't built before the server started. | Stop the server (Ctrl + C), run npm run build, wait for it to finish, then run npm start. |
| The AI returns invalid JSON or struggles with complex SQL joins | 0.5b is a very small model (about 400 MB) meant for low-RAM testing, so it sometimes misformats complex queries. | Ask simpler, single-step questions. If your computer has 8 GB+ RAM, run ollama pull qwen2.5-coder:3b and set LLM_MODEL=qwen2.5-coder:3b in .env. |
Quick Cheat Sheet: Starting It Next Time
Once you've completed this setup, you never need to reinstall anything. Next time you turn on your computer:
-
Make sure the Ollama app is running.
-
Open Terminal / PowerShell, go to the folder, and start the server:
cd db-agent/app npm start -
Open http://localhost:3001. Press
Ctrl + Cin the terminal whenever you want to turn the server off.
Sample Screens
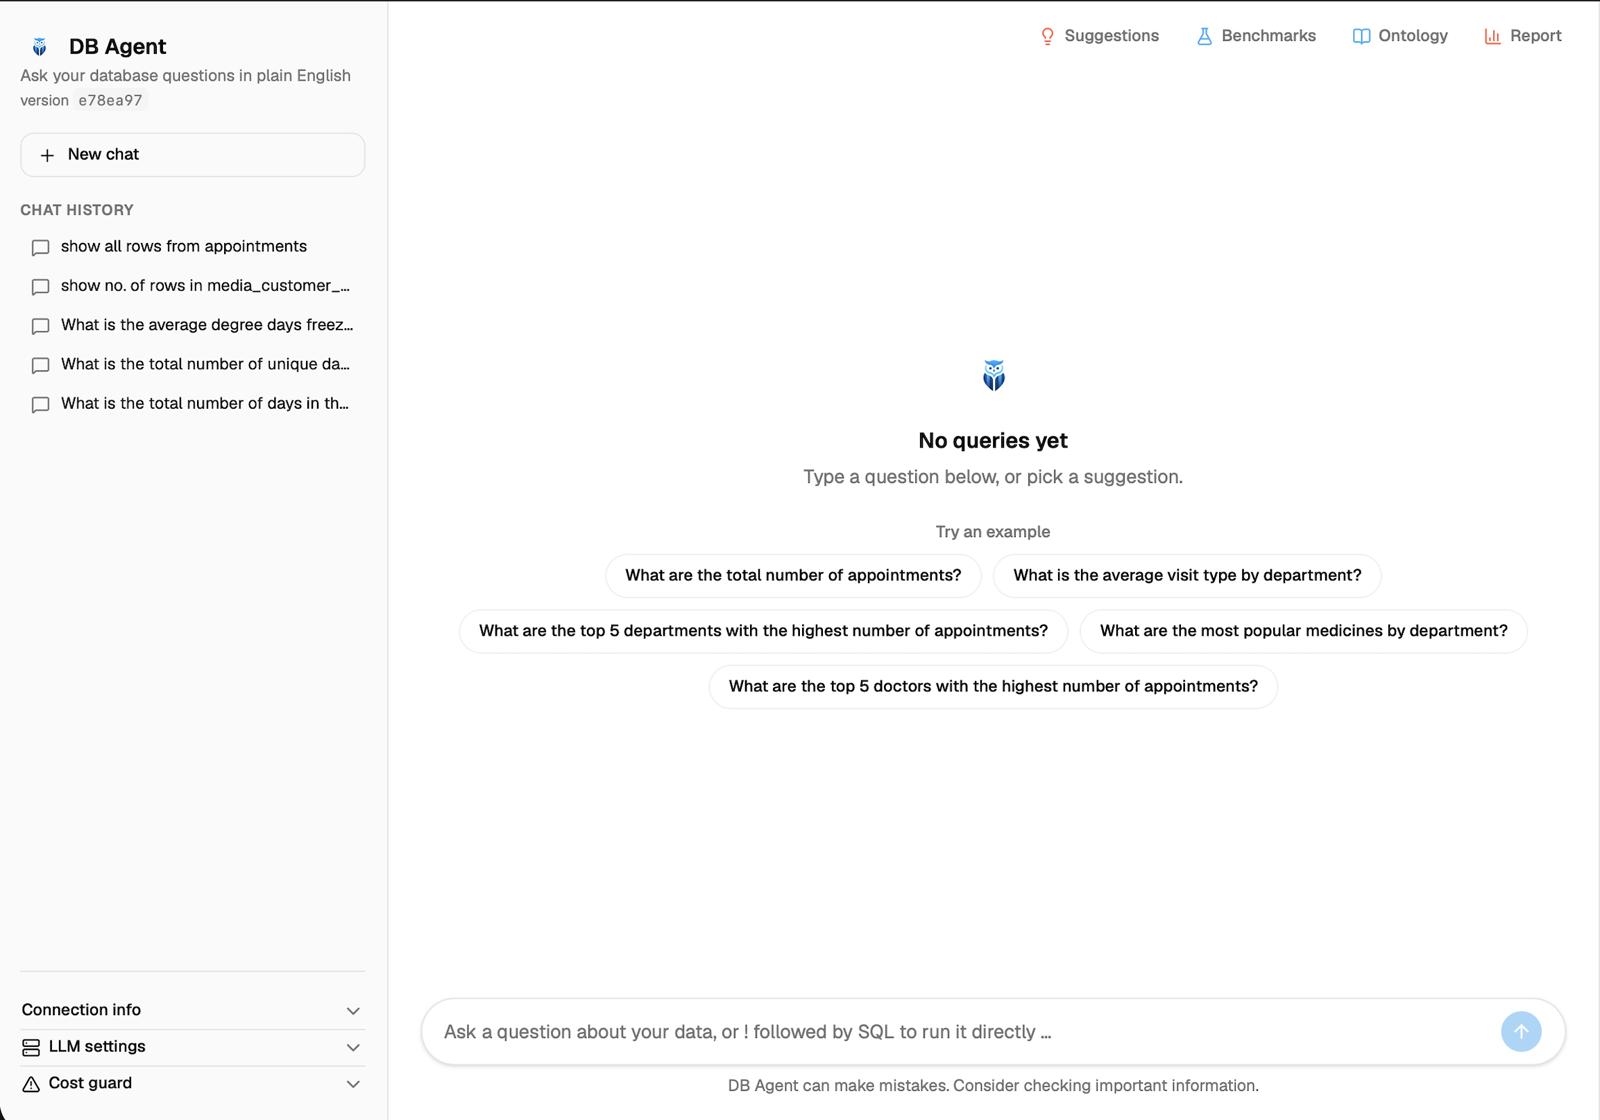
The db-agent home screen:
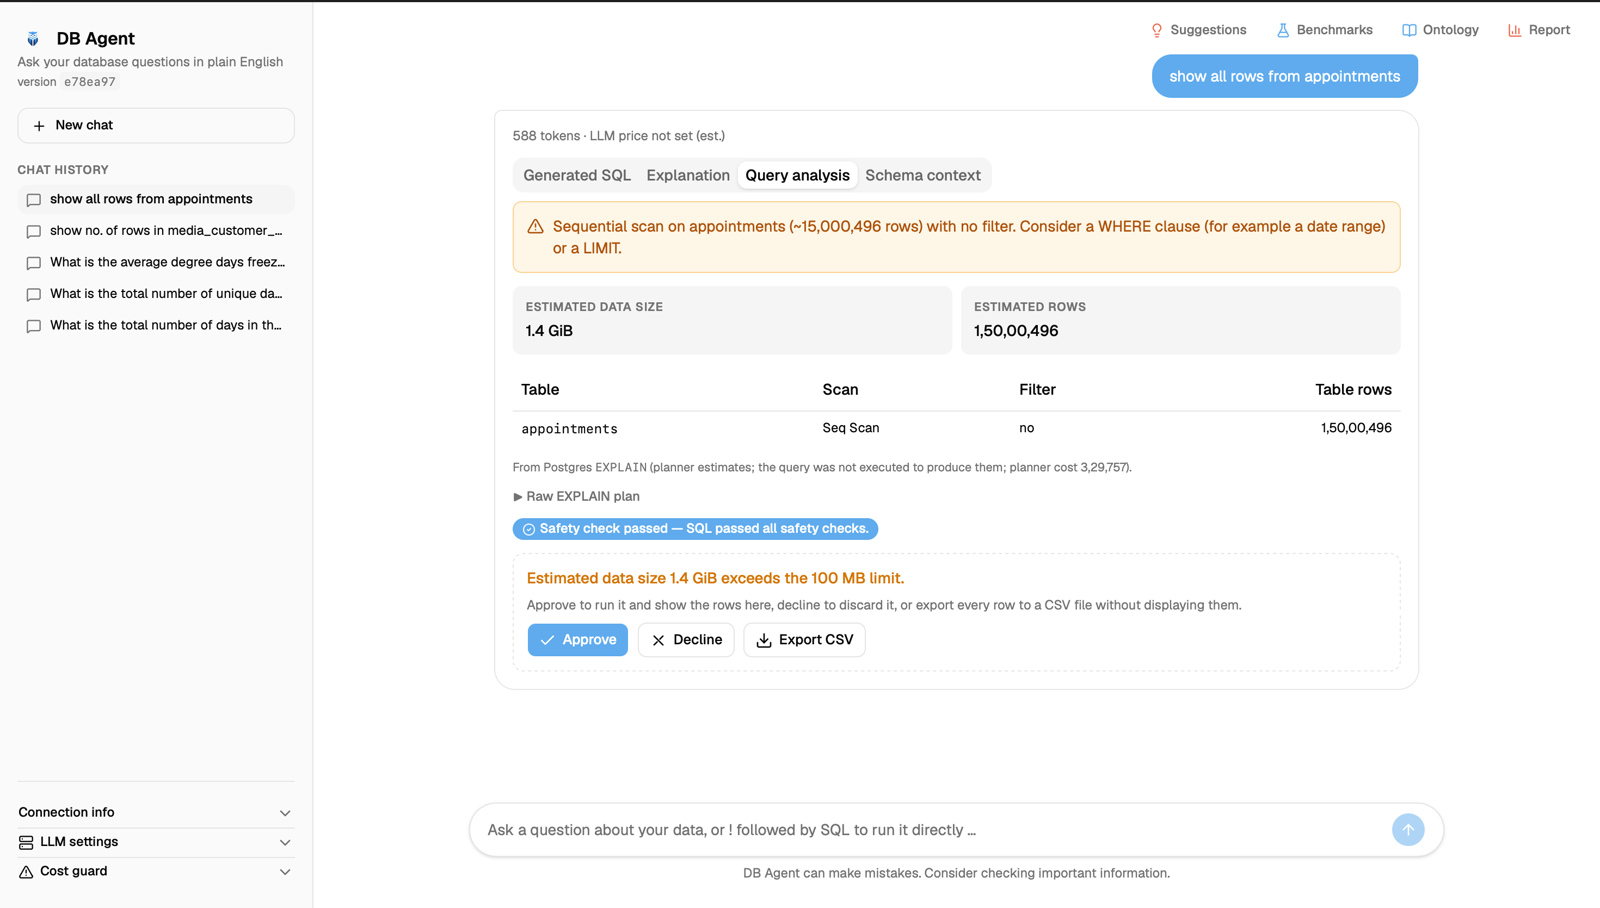
An example question: for a heavy query, db-agent shows the estimated cost and asks you to approve before it runs:
The example query answered:
Local setup vs Databricks Free Edition
| Local (this guide) | Databricks Free Edition | |
|---|---|---|
| Where it runs | Your Windows or Mac computer | A free Databricks workspace, as a Databricks App |
| AI model | Ollama with a small local Qwen model | See the Databricks guide |
| Best for | Learning, offline use, Postgres or SQLite on your machine | Querying data that already lives in Databricks |
Both options use the same open-source db-agent. Start local to learn how an AI agent turns a question into SQL, then move to Databricks when your data lives there. The hosted route is covered in Run a Text-to-SQL AI Agent on Databricks Free Edition.
Frequently Asked Questions
Do I need an API key or cloud account to run db-agent locally?
No. With Ollama the model runs on your own computer. The LLM_API_KEY=ollama value in .env is just a placeholder the app expects.
Does db-agent work on Windows as well as Mac?
Yes. The steps above cover both. On Windows, run npm install, npm run build and npm start directly, because PowerShell cannot run the run_local.sh script (Git Bash can).
Which Node.js version do I need?
Node.js v22.5.0 or higher, because db-agent uses the built-in node:sqlite module. Older versions fail with Cannot find module 'node:sqlite'.
Can I connect db-agent to my own Postgres database?
Yes. Set SQL_ENGINE=postgres and add a DB_URL in .env. db-agent only reads data and never changes it, but a read-only database user is still the safest choice.
Is the 0.5B Qwen model good enough?
It is fine for simple, single-step questions and for learning how the agent works. For complex joins, use a larger model such as qwen2.5-coder:3b if your computer has 8 GB of RAM or more.
Can I run db-agent on Databricks Free Edition instead of locally?
Yes, there is a separate guide for deploying db-agent as an app on a free Databricks workspace. See the Databricks Free Edition setup guide linked below.
Where to go next
- The source and issue tracker: github.com/db-agent/db-agent
- Prefer a hosted setup on a free Databricks workspace? See Run a Text-to-SQL AI Agent on Databricks Free Edition.
- More tools in the toolkit: becloudready.com/tools/db-agent